Unfortunately I had missed to document the construction of the nesting boxes with photos. But since I followed the building instructions of NABU as far as possible, everyone can get the appropriate inspiration from there. You can find the building instruction as PDF on this page of NABU
Because I had to install the camera equipment in the nesting box, I adjusted the height of the nesting box. So the back wall of my nesting boxes has a total height of 39 cm and the front (door plus the screen above) 36 cm. Thus I had enough space to accommodate the technology.
The space for the technical equipment was shielded from the rest of the nest box by a plexiglass panel. “Had” because I equipped the nesting boxes with other cameras in summer and the plexiglass pane was no longer necessary.
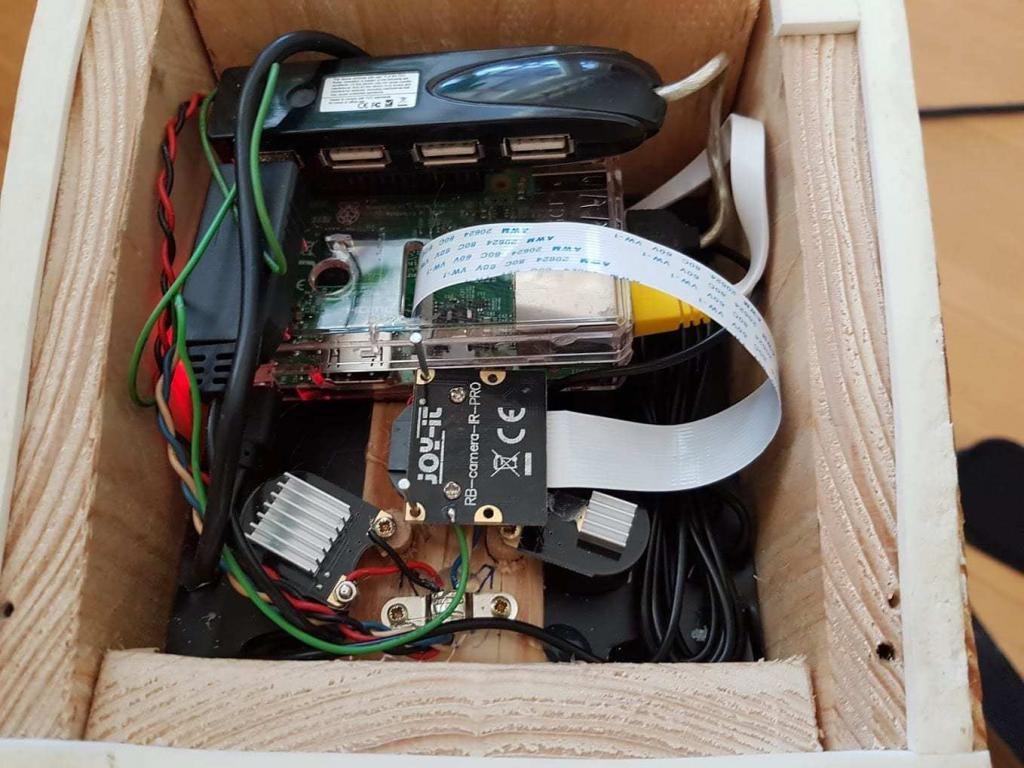
In the beginning I had only equipped one nesting box with a camera. The camera was a Raspberry Pi 3 with IR camera and IR lamps.It looked like the picture on the right.
As software on the Raspberry I used motionEyeOS. motionEyeOS is a Linux distribution that turns a single-board computer into a video surveillance system. Ready made images are available for download. You can configure everything easily via a web interface.
The first breeding season was then followed with this equipment. But during operation the weaknesses of the system became apparent. On the one hand I had unfortunately operated the IR lights with a voltage of 5V instead of the intended 3.3V, which had the consequence that the IR lights broke down after a short time. On the other hand the pictures were quite jerky and I could only work in the IR mode of the camera during the day, because it was not bright enough in the nesting box for the Raspberry camera.
Therefore I decided to equip both nesting boxes with new technology after the end of the breeding season in summer. On the website of Alexander Fuhr I had seen with which quality pictures from the inside of a nesting box are possible. Therefore I decided to use IP cameras of this manufacturer in the dome construction.
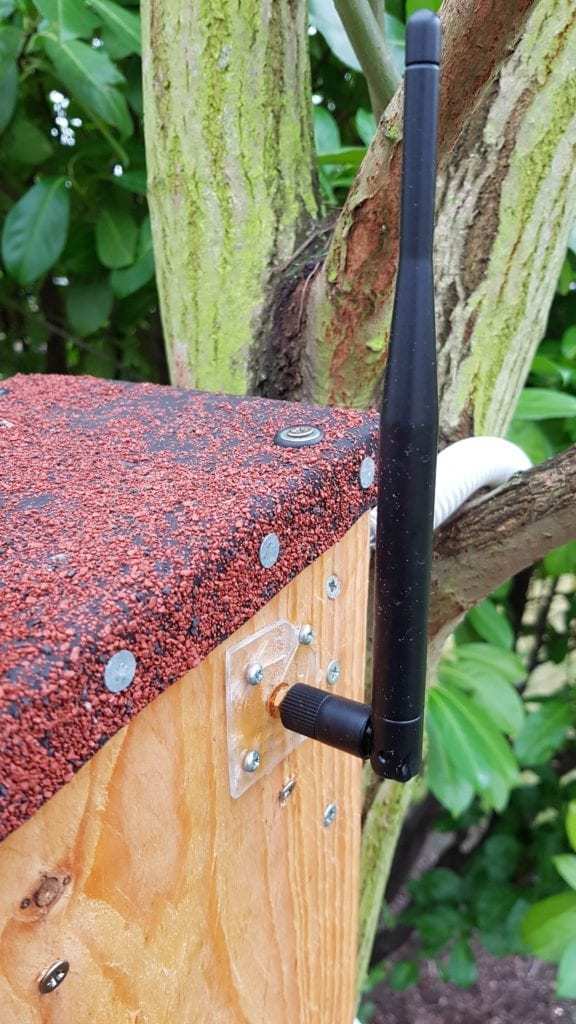
However, I was afraid that the WLAN connection would not be good enough to get a clean and smooth stream because of the built-in WLAN antenna, which is located inside the metal housing of the camera models I use. Fortunately, the internal antenna of the camera model I use is connected to the WLAN board via a short cable with an iPEX connector. This gave me the opportunity to modify the camera. With the help of a cable iPEX plug to SMA socket and a WLAN antenna I was able to move the antenna to the outside to have a better WLAN reception at the nest boxes. This looks like the picture on the right.
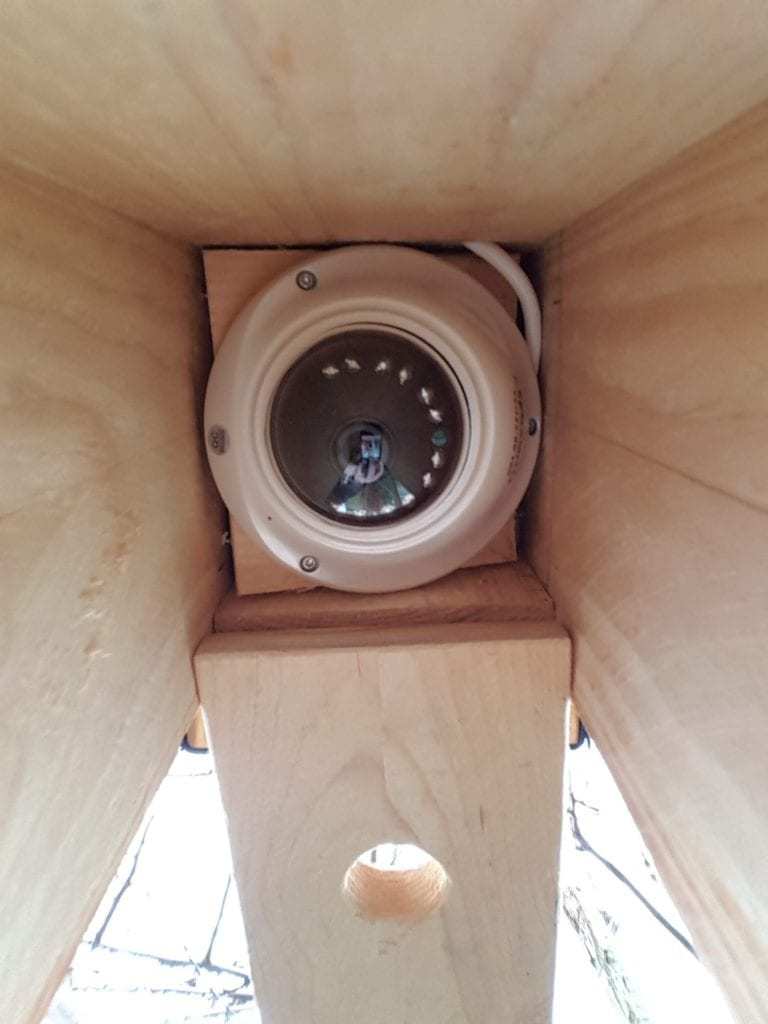
I screwed the camera to a 12cm x 12cm board, which I then fixed slightly slanted inside the nesting box. Since the camera has to look vertically downwards, but the lens cannot be adjusted quite as far from the orientation, I had to compensate for this by mounting the board at a slight angle. But that was no problem.
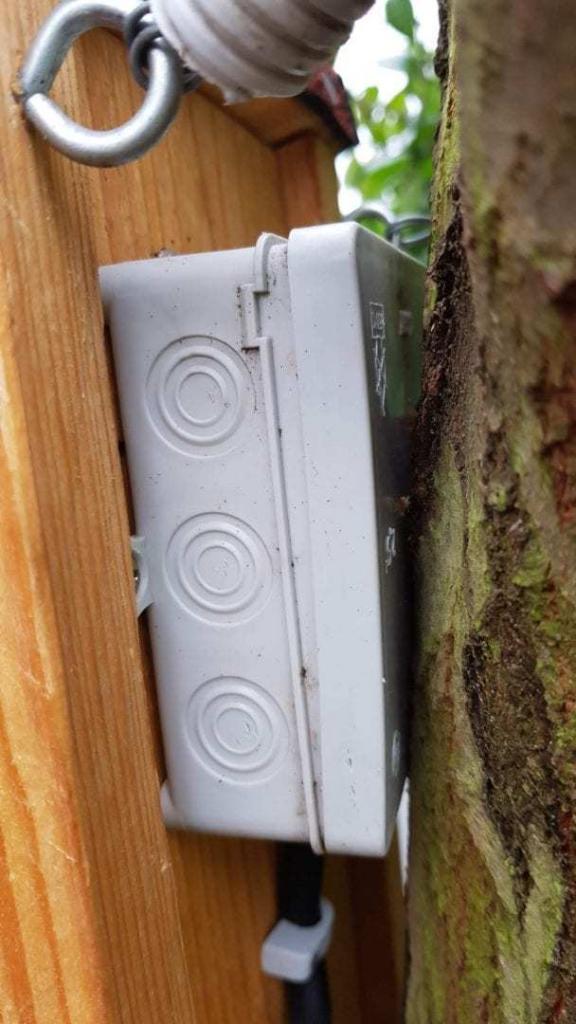
I put the connection cables of the camera through the back wall into a normal damp room junction box. This is also the power supply for the camera. Since there is not enough space in the junction box for the included power supply, I had to think of something else. As power supply I used a 12V power supply from Reichelt. This fits exactly into the junction box. In addition a cable with a suitable hollow plug for the connection to the power supply to the camera.
This is the final and current “state of development” of the two nesting boxes used here on the website.
Update: The nesting boxes in the form are no longer in use, in the meantime the nesting boxes are available in the 2nd version with two cameras per nesting box for the additional view from the side.
I provide the live streams here on the website with the help of the free software “Restreamer”. The software runs on two Raspberry Pi 3 (each Raspberry 2 cameras) and provides the streams in the embedded player. A really very simple and fast solution to integrate RTSP camera streams into a website.
Update: The embedding of the live stream is now realized via the webcam service provider Livespotting. Livespotting offers me the possibility to upload the live stream to their server and then embed their player on my homepage. Because the access to the live stream is done by Livespotting and their servers, it is no problem if many viewers watch the streams. My internet line would have been overloaded at some point.
Therefore a big thank you to the team of Livespotting for their support!
If I have aroused your interest and you would like to copy the nesting box, you are welcome to contact me if you have any questions about the implementation. Just use the contact form.