
BUILD PROJECT · HEDGEHOG PROTECTION · CAMERA TECHNOLOGY
In spring 2020, I came up with the idea of building my own hedgehog house with a camera. The inspiration came from a pair of hedgehogs visiting the feeding area and the hope of perhaps being able to offer a female a protected place for her young.
The detailed instructions include a materials list, cutting dimensions, the exact positions of all openings and every assembly step.

The outside dimensions of the house are 73 × 40 cm. The left outer wall is 24 cm high and the right wall 39 cm, creating the roof slope. The house is built from untreated timber: 18 mm for the walls and flap, 28 mm for the floor and 12 mm phenolic-coated plywood for the lid.
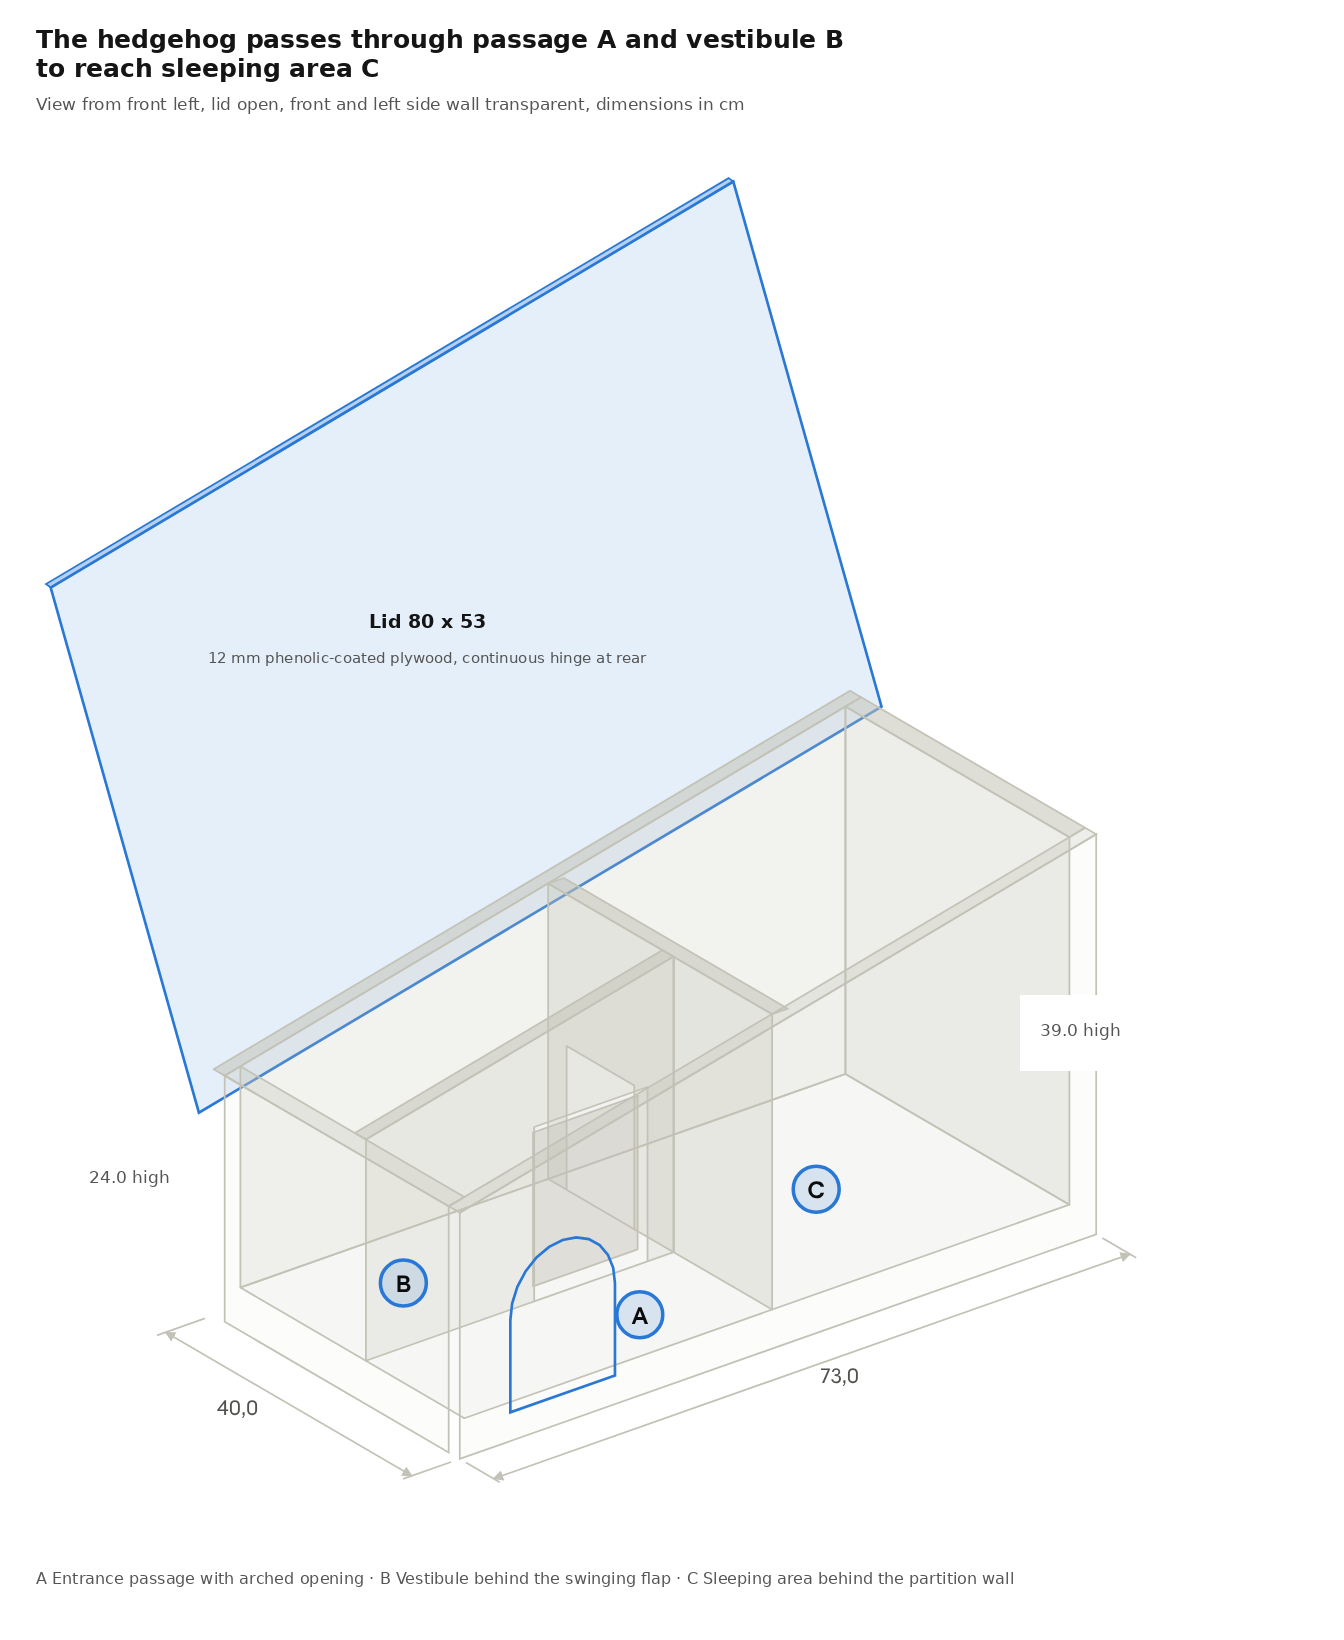
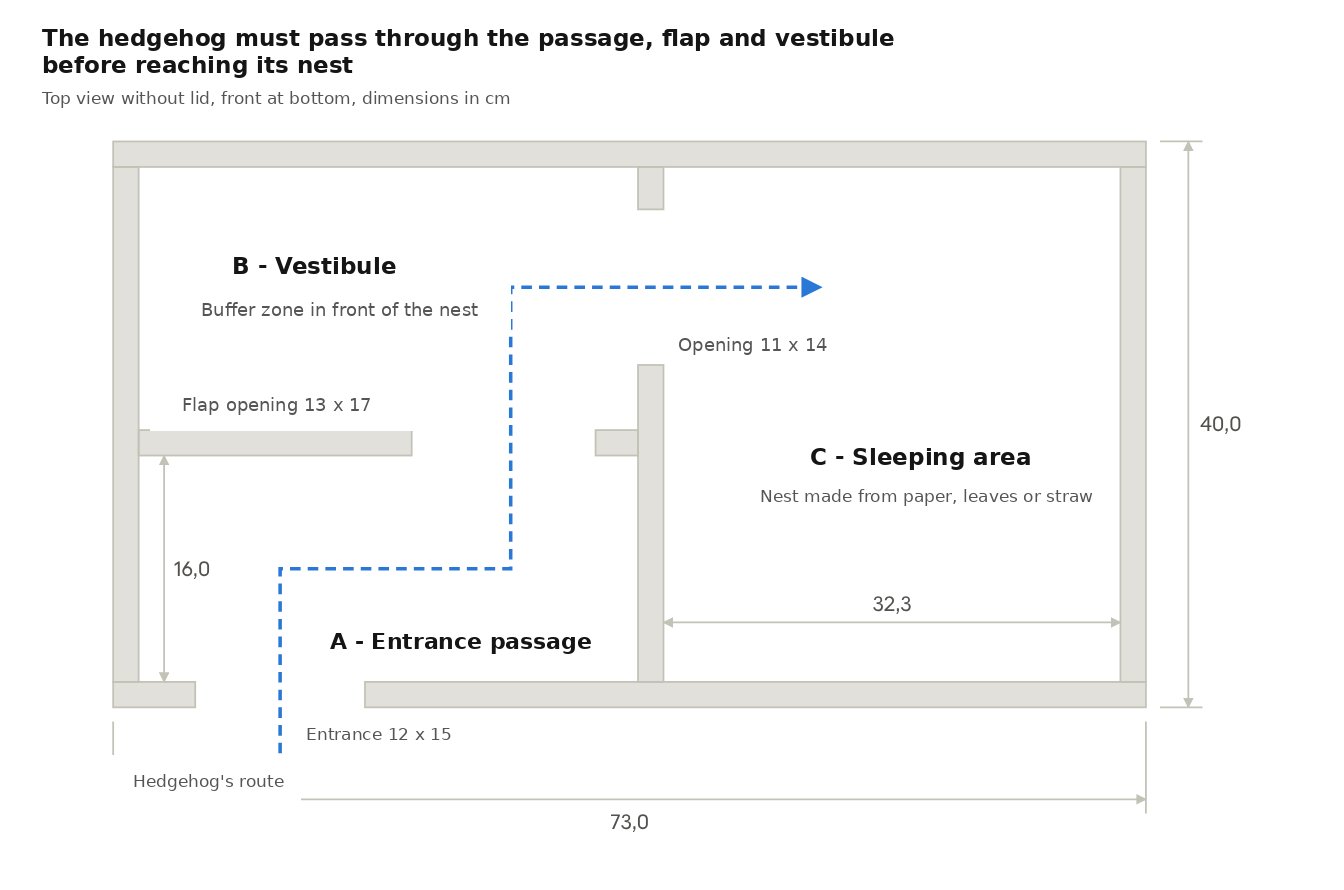
The passage wall separates the entrance passage from the vestibule. Only after passing through the flap at the end of the passage and the opening in the partition wall does the hedgehog reach the sleeping area. The narrow passage with its bend makes access difficult for cats, while the heavy flap provides an additional obstacle for mice and rats.
The front and rear walls are trapezoidal. The lid rests on their sloping upper edges. The passage wall and partition wall stand on the floor and reach up to the lid; the passage wall follows the roof slope.
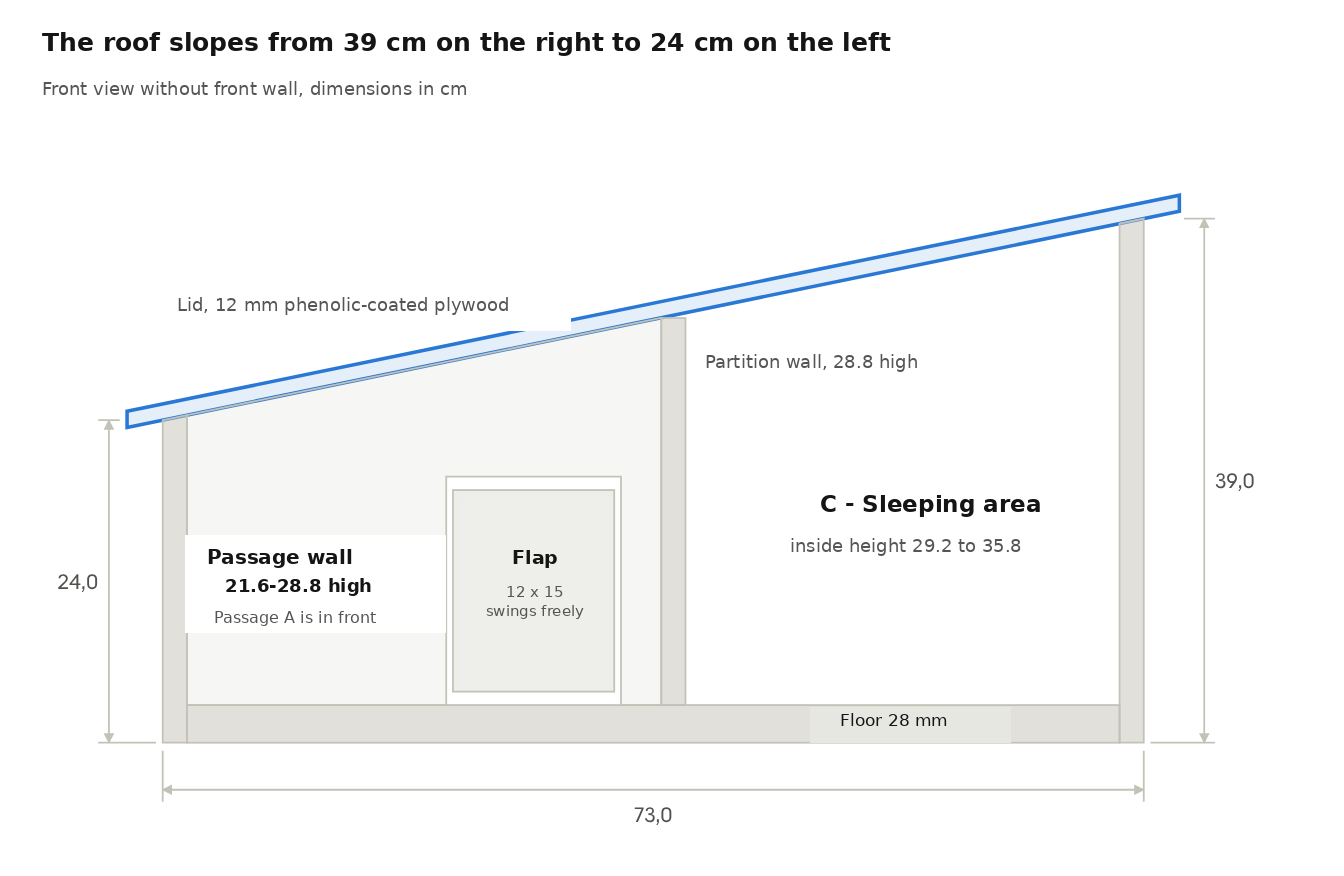
The floor is smaller than the outside dimensions by the thickness of the walls. The outer walls surround it on all sides so that rainwater can run down the outside instead of entering over an exposed floor edge. The interior walls stand on the 28 mm floor and are therefore lower than the outer wall height at the same point.
| No. | Part | Qty. | Dimensions | Work required |
|---|---|---|---|---|
| 1 | Floor | 1 | 69.4 × 36.4 cm | 28 mm thick; fits inside between the outer walls |
| 2 | Front wall | 1 | 73.0 cm long; 24.0 cm high left / 39.0 cm right | Trapezoid; 12 × 15 cm entrance with rounded top |
| 3 | Rear wall | 1 | 73.0 cm long; 24.0 cm high left / 39.0 cm right | Trapezoid with sloping upper edge |
| 4a | Left side wall | 1 | 36.4 × 24.0 cm | 3 ventilation holes Ø 10 mm in the rear half |
| 4b | Right side wall | 1 | 36.4 × 39.0 cm | 3 ventilation holes Ø 10 mm |
| 5 | Partition wall | 1 | 36.4 × 28.8 cm | 11 × 14 cm opening; stands on the floor |
| 6 | Passage wall | 1 | 35.3 cm long; 21.6 cm high left / 28.8 cm right | Trapezoid; 13 × 17 cm flap opening |
| 7 | Lid | 1 | 80.0 × 53.0 cm | 12 mm phenolic-coated plywood; seal cut edges |
| 8 | Flap | 1 | 12.0 × 15.0 cm | 18 mm timber; its weight makes entry harder for mice and rats |
Position of the openings
A quiet, shady position under a hedge or shrub, with the entrance facing away from the prevailing weather, is especially important if the house is to be accepted by hedgehogs.
My original hedgehog house was built in 2020 and was additionally equipped with camera technology. The photos show several stages of the build and the finished house in its sheltered location. The new building instructions above are deliberately designed so that the house can also be built completely without camera equipment.
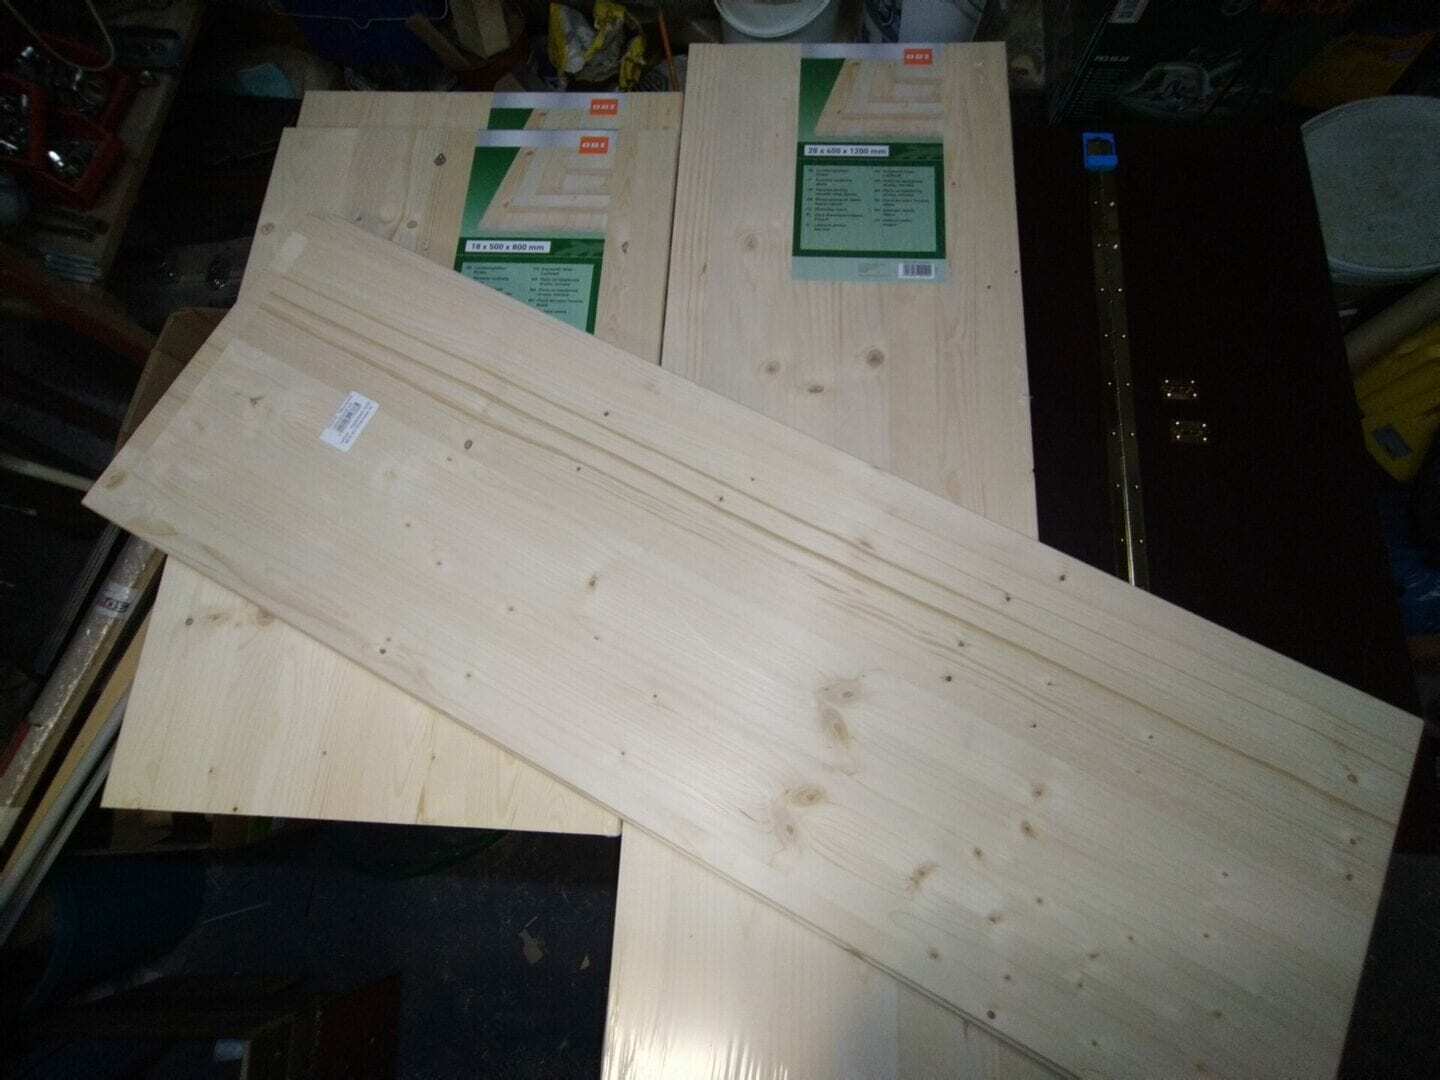

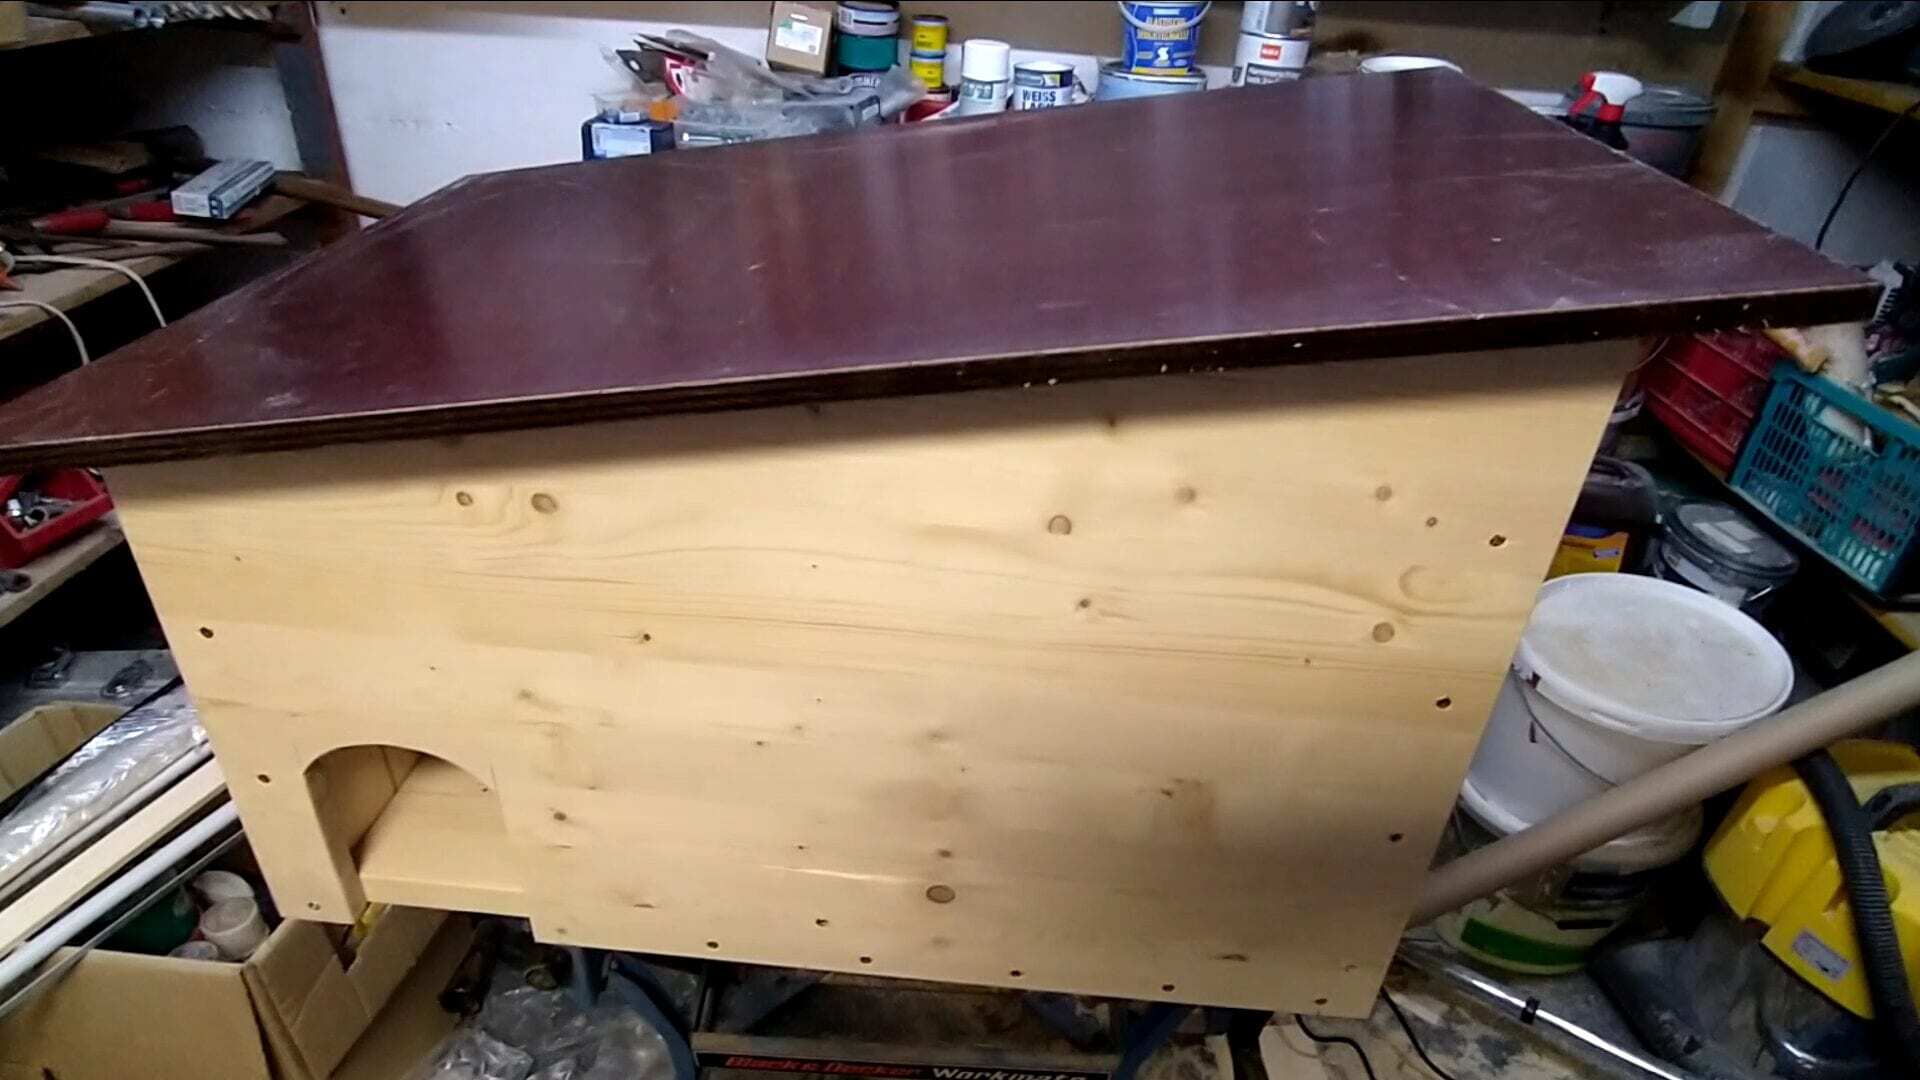
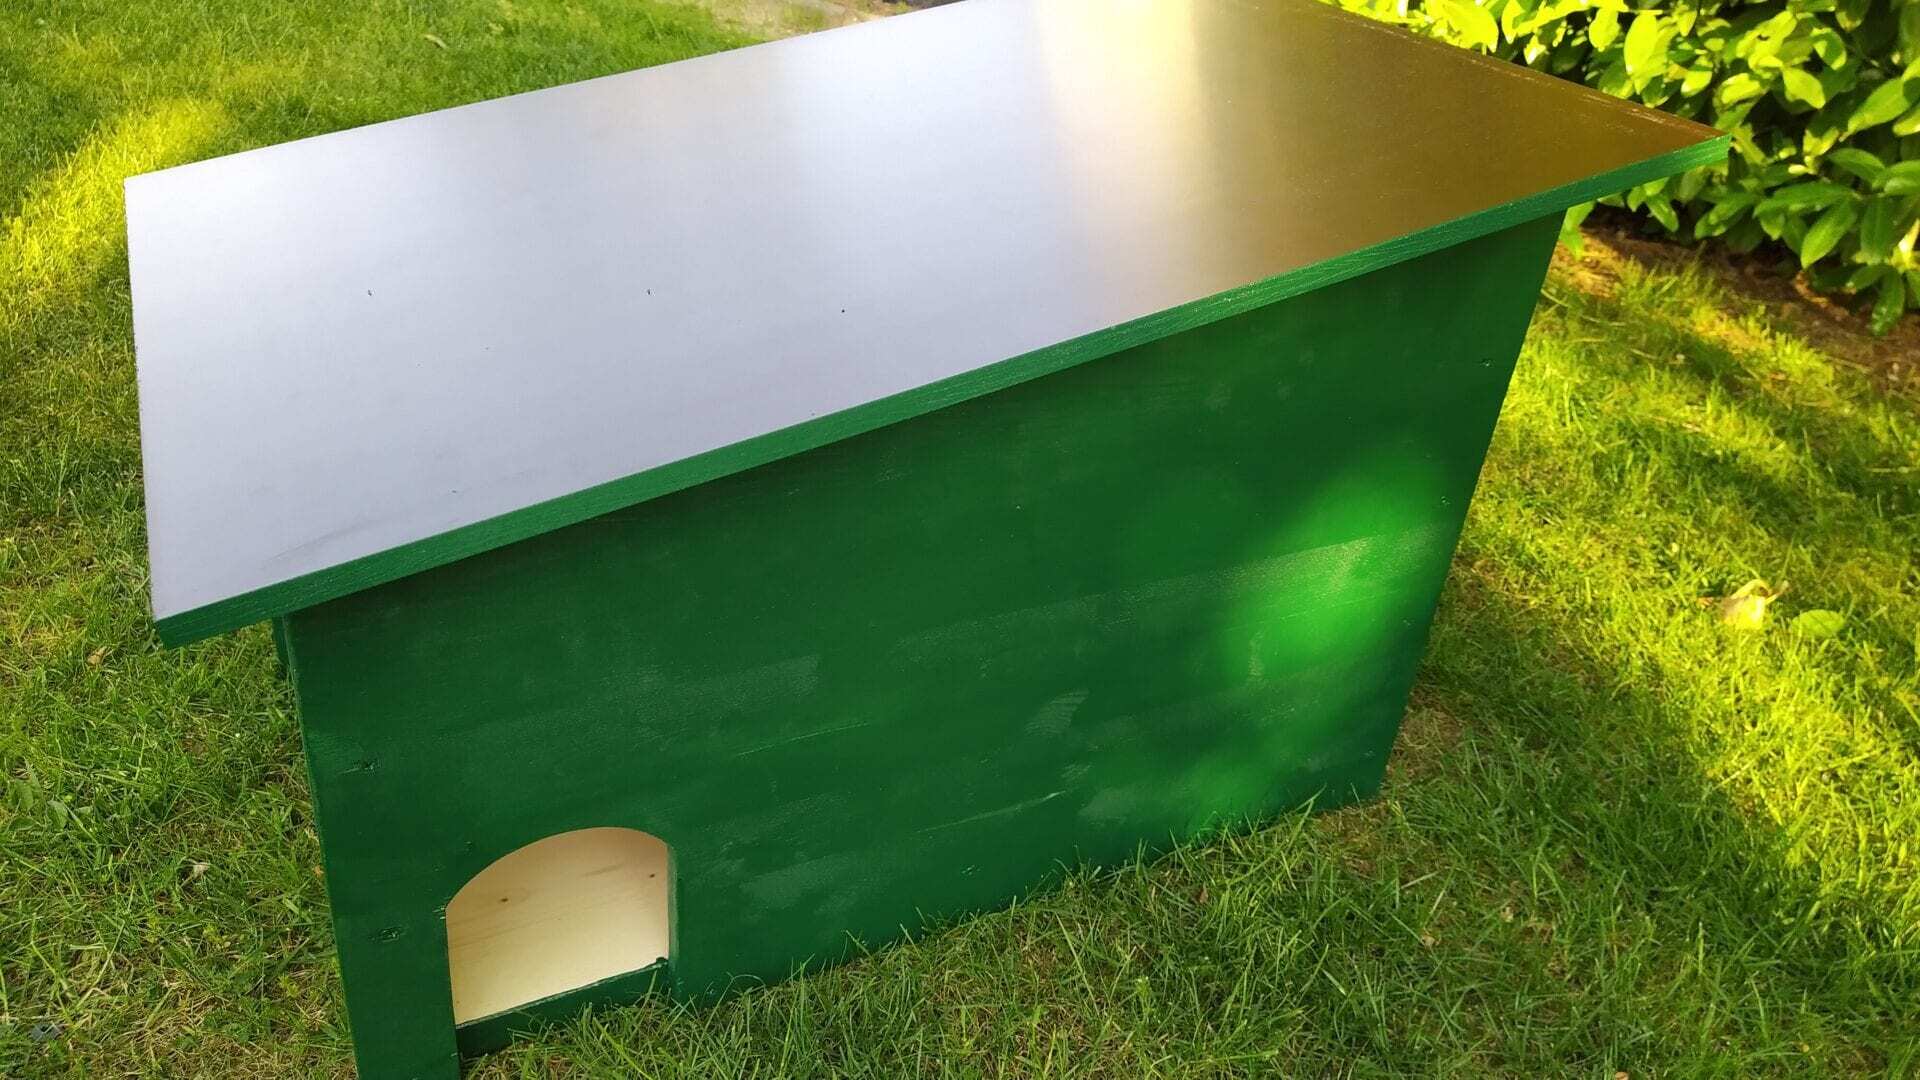

The complete building instructions with drawings, cutting list and all 11 steps are available as a five-page PDF.
If anything is unclear while you are building the house, or if you would like to share your own experience with a hedgehog sleeping house, you can leave your question or comment here. I will reply directly below your comment so that the answer can also help other people building the house.