BUILDING GUIDE · TECHNOLOGY · PROJECT HISTORY

Nest Box – First Version

This is how the first camera-ready version of my nest boxes was created. It was based on a NABU building guide, with extra height and space added for the camera, power supply and later technical modifications.

Basis & Adjusted Dimensions

I built the wooden box largely according to a NABU guide. Because additional camera equipment had to fit in the upper section, I made the box taller.

Back panel: 39 cm
Front including door and trim: 36 cm

The technical section was initially separated from the nesting chamber by a Plexiglas panel. After later camera modifications, this separation was no longer needed.

Open the NABU building guide

The First Camera Setup

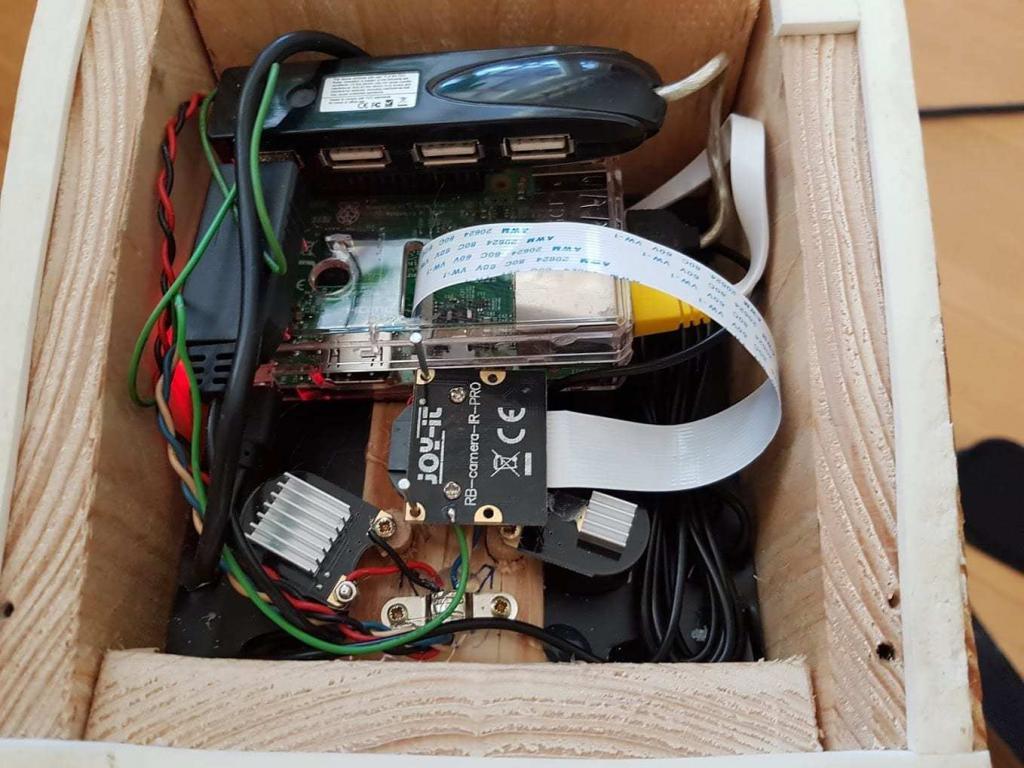
The first camera-equipped nest box used a Raspberry Pi 3, an IR camera and IR lighting. At the time, the software used was motionEyeOS zum Einsatz.

The limitations of this setup became apparent during the first breeding season. The IR lights were accidentally operated at 5 V instead of 3.3 V and failed early. The recordings were also relatively jerky, and even during the day there was hardly enough light inside the box for a normal camera mode.

Historical setup

This technology documents the first stage of the project and is no longer in use today.
Upgrade to IP Dome Cameras

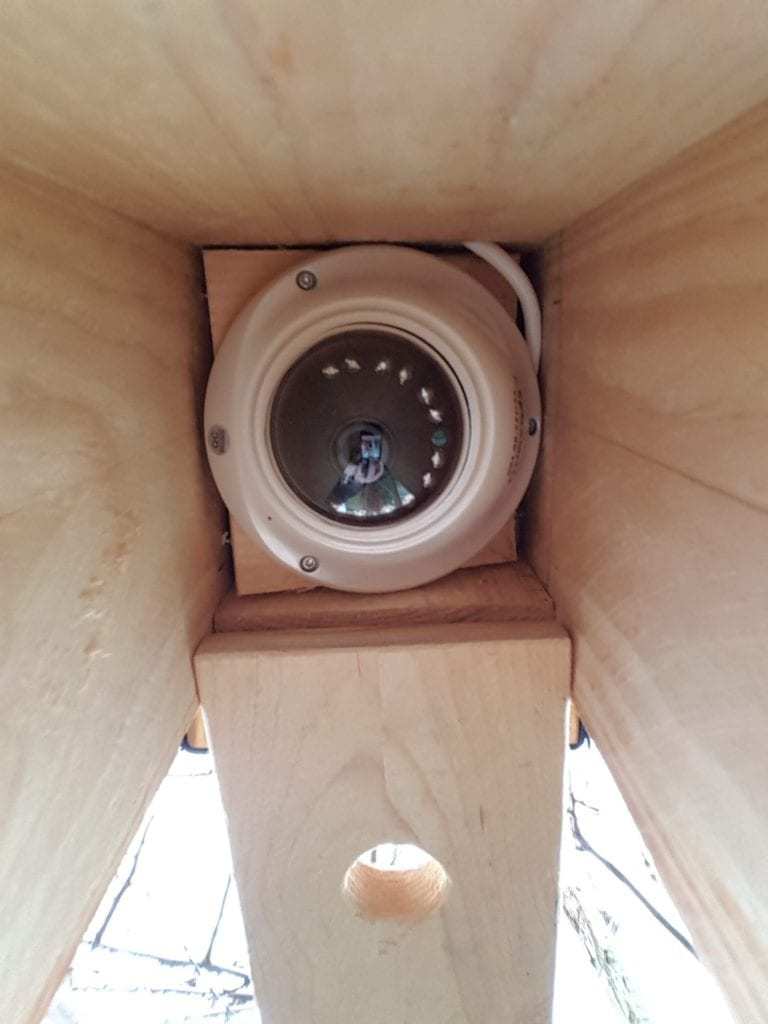
After the first season, both boxes were converted to dome-style IP cameras, mainly because of the significantly better image quality.

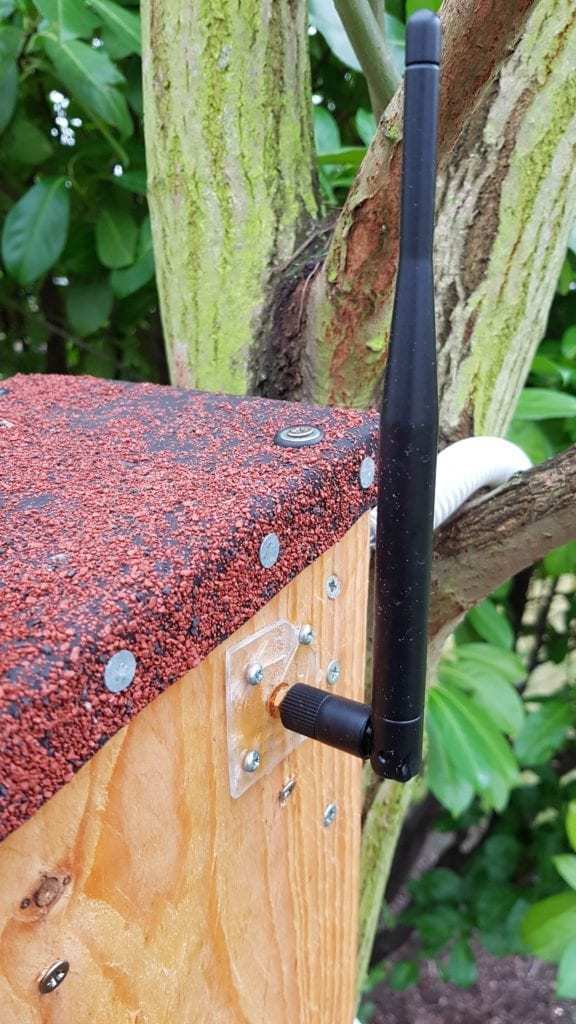
Because the Wi-Fi antenna of the camera model was located inside the metal housing, I routed the internal antenna to the outside via the existing iPEX connector. Using an external Wi-Fi antenna provided a more stable connection.

The camera itself sits on a roughly 12 × 12 cm board mounted at a slight angle inside the box, allowing the lens to point straight down.

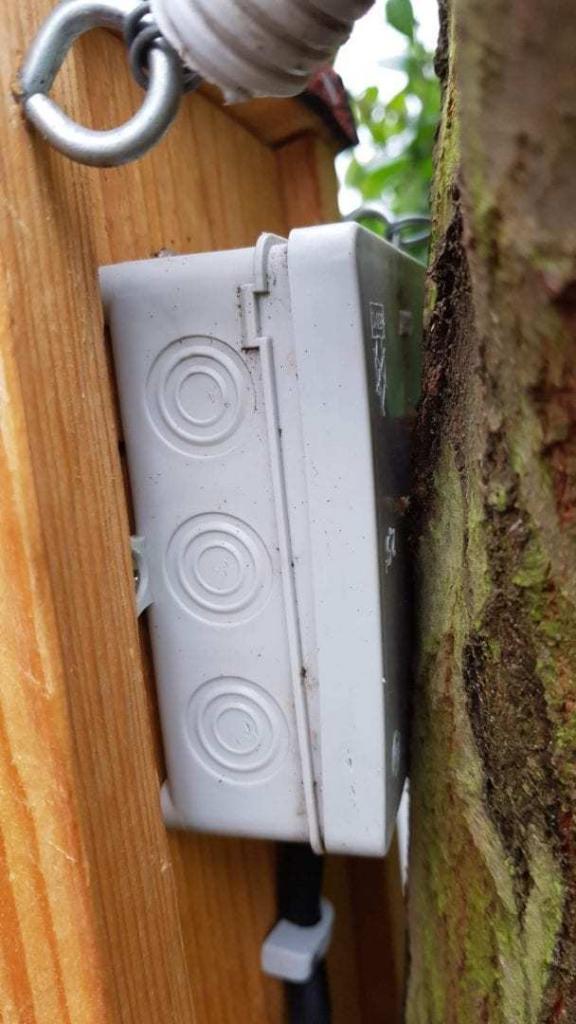
Connection cable and power supply inside the weatherproof junction box

Power Supply & Connections

The camera cables were routed through the rear panel into a weatherproof junction box, which also houses the power supply.

Because the original plug-in power supply was too large for the box, I used a compact 12 V switching power supply instead. With the appropriate cable, the camera could be powered directly from it.

This kept the camera connections and power supply protected outside the nesting chamber.

What Became of It

This first version remained part of the project for several years, but was later replaced by an improved design with an additional camera angle.

The streaming technology also went through several stages: initially local solutions using Restreamer, later temporary integration via Livespotting. This page therefore deliberately documents the technology used at the time and the development of the project.

Questions About Building Your Own?

If you want to reproduce individual details or have questions about the original implementation, feel free to get in touch.